Modeling the knit
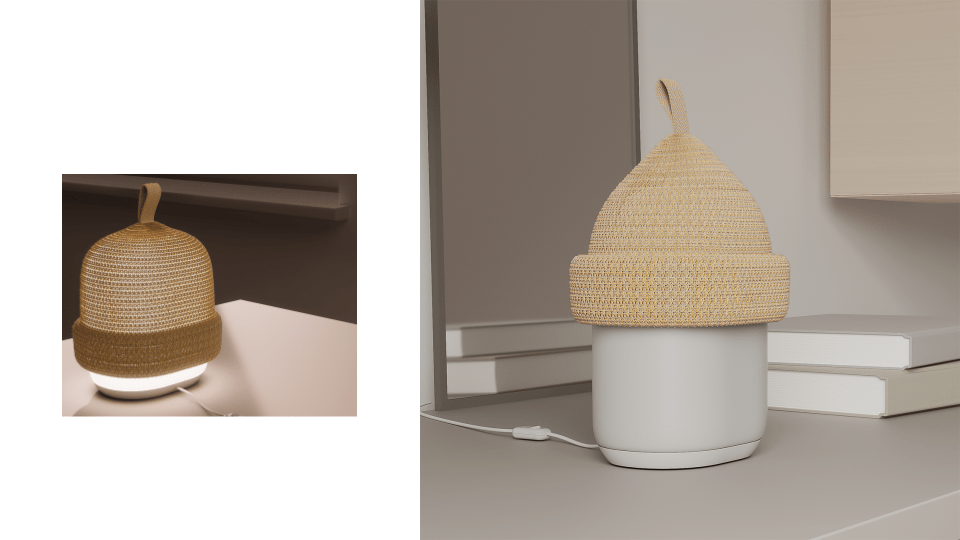
Following up on our Beni Lamp design article, we wanted to discuss the process we used for 3D modelling the textile for use in Gray Dawdy‘s renderings.
There are textile rendering “swatch” libraries available online, but we wanted to be able to do a first pass assessment on light transmission with our renderings, so we needed to actually create the structure of the yarns in the textile.
This isn’t how academic papers or materials libraries model fabrics. Libraries like VMOD scan textiles, so there is no way to adjust the structural parameters like loop length. Researchers who are interested in physics-based simulations do build up 3D models from the yarn level, similar to our approach, but they create the yarn path very simply (exactly like the knit structure diagram), and then use recursive modelling with applied forces and inter-yarn friction to distort that simple model into the real yarn path.
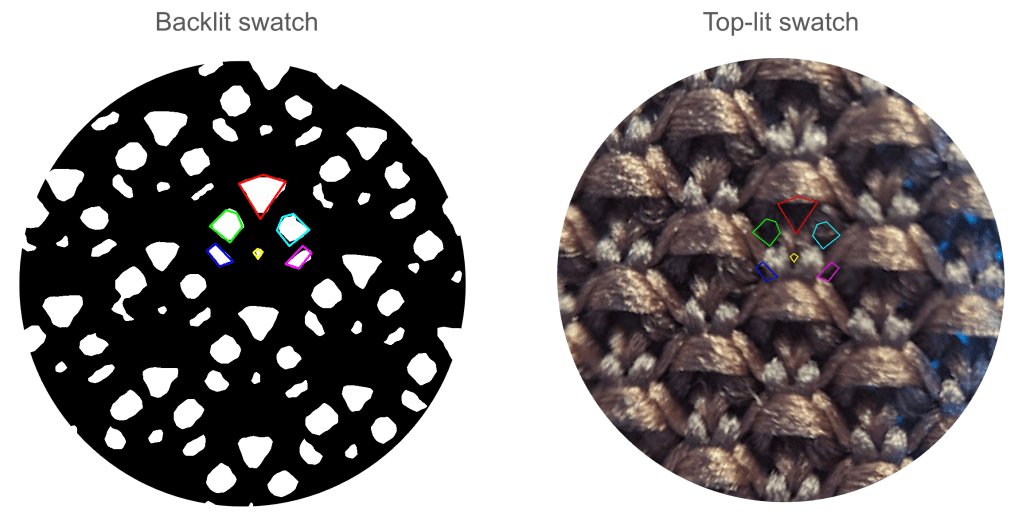
Our process started with understanding the chosen knit structure by comparing close-up images of a real fabric with the knit structure diagrams.
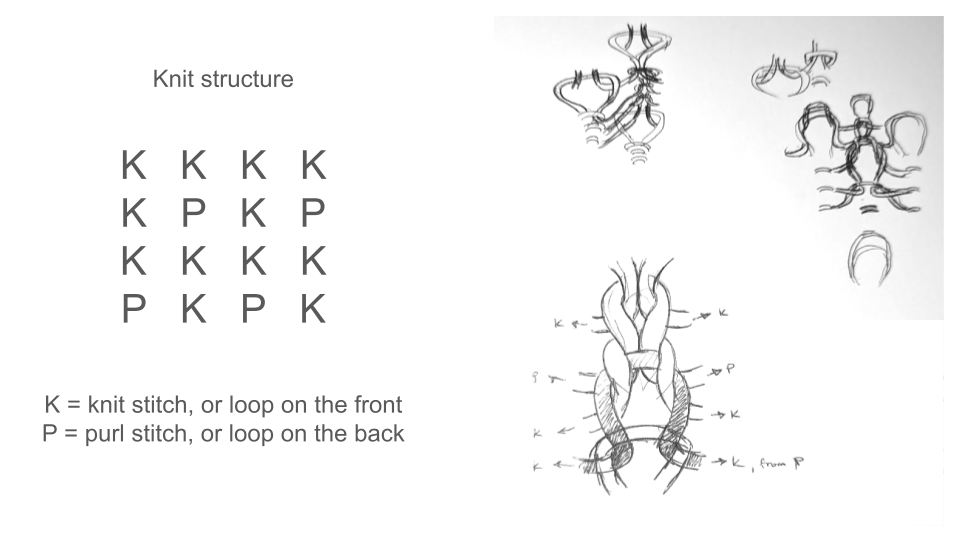
We sketched the yarn paths by hand to visualize how the loops interlock and pull each other into final shape. We wanted more control over colors and texture than scanning a single real fabric would give us, so the next step was to create a 3D model of the yarns.
14 hours of CAD, sketching, Illustrator, and more CAD later, and we had a model with sufficient realism to achieve the intended texture and opacity in rendering.
However, this was certainly not a perfectly realistic representation of the yarns in a real fabric, nor was it as parametric as we had planned. Some shortcuts had to be made, especially to achieve the correct opacity.
We learned several lessons through this method of modeling knits:
- This is a relatively simple fabric – it is easy to see why it is tight in certain areas and looser in others, in other words, how the fabric texture arises from the knit stitch structure – and yet, it took as long as our worst-case estimate to create just a rough model.
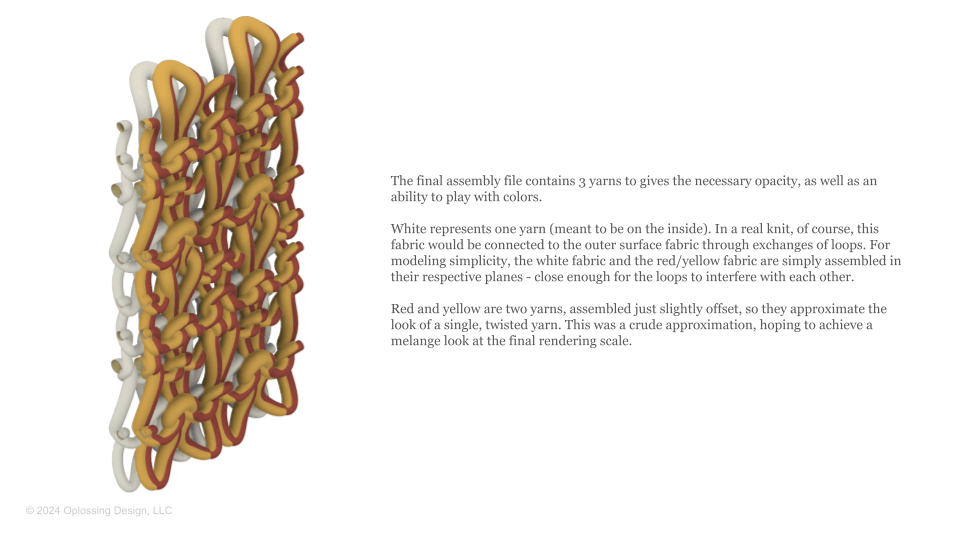
- It was very difficult to make the model parametric from the start. We drove it with a couple parameters (yarn diameter, gauge) to get on the right track. However, if a more refined model, true double jersey, or truly accurately modelling a twisted yarn were necessary, we would need to start from scratch; the model built could not loft larger diameter yarns, and so we assembled three yarn models to achieve the required opacity.
- More than 60% of the modelling time (9 of 14 hours) was spent figuring out how to accurately represent the knit structure’s subtle interplay between front and back plane (i.e. knit and purl stitches). This is unavoidable time that must be invested for each knit structure modelled.
- 3D modelling the textile has benefits and drawbacks. It might be worth creating a model to explore certain technical characteristics (light transmission, reflectivity, roughness), if the knit structures is simple and the cost of prototyping is quite large. On the other hand, achieving a physically accurate 3D model for structural simulation or airflow would be difficult with this 3D, yarn-modelled approach and unlikely to be cost effective relative to the accuracy achieved. In the past, we have worked with teams to create test-data-driven FEA models for vibration analysis, but they represent the textile’s behaviour, not its yarn structure. In other words, these models don’t look like the real fabric.
Worth it for Beni, worth considering carefully in the future. Reach out if you have a project that might need textile modelling for decision-making.