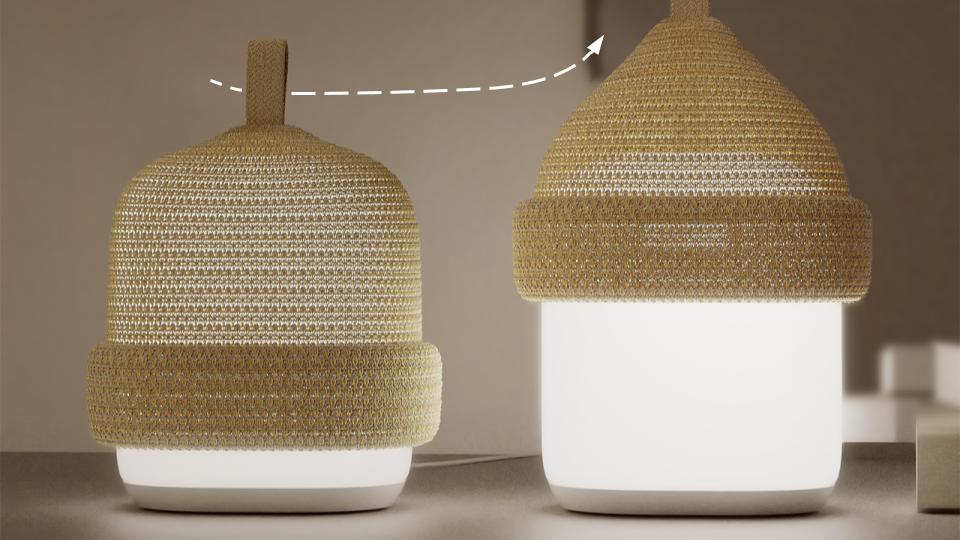

In a recent collaboration with Gray Dawdy, Oplossing Design specified the “hat” textile for Beni. Here’s what that design process looks like.
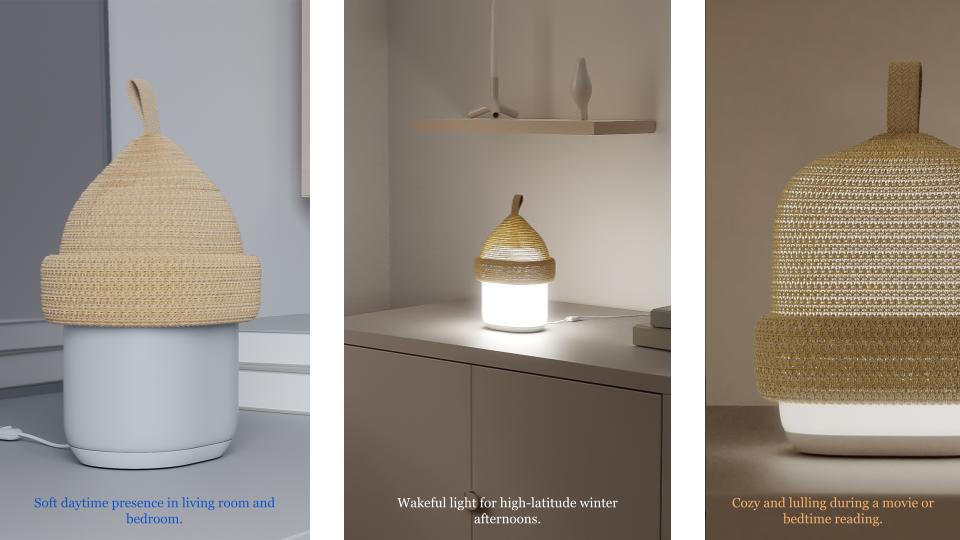
- Working closely with the industrial designer, we discuss the user problem that the product is solving – a need for adjustable light levels throughout the day. Eventually we settled on the project brief: “Beni is a lamp with adjustable coziness through the tactile, childlike interaction with its hat. To make the room more cozy, just pull the beanie down over the lamp surface. To make it brighter, pull up on the convenient tab.”
- Based on this brief, we can articulate the design requirements, consider tradeoffs between possible solutions, and decide on the most promising path.
- This work was to develop a concept study, but if we were continuing to production, we would:
- Outline our most pressing design questions. For example, “Can a 100% cotton knit expand and contract to fit on the lamp middle and top in a satisfying way, even after 5, 10, or 100 cycles of adjusting the lamp brightness?”
- Plan how to build rough prototypes that have just the right fidelity that they can answer our questions. Here, the fabric needs to be knit, and made of the intended yarns, but it doesn’t need to be knit on exactly the factory machine we intend.
- Repeat step 2.0, above, until the design is sufficiently completely described to build a prototype that answers the most pressing design questions.
- Prototype and assess.
- Reassess our critical questions and step 2 at a higher fidelity, as needed, until the design is robust.
- Choose our production partners, explain the product intent and design to them, and build increasing numbers of samples with them to catch any issues that are due to making lots of products on their specific machines.
Oplossing Design specializes in anticipating challenges at the prototype stage, so that each product’s journey to mass production is as smooth as possible.
So how do we do that during the concept phase? We carefully consider how to achieve the design rationale through materials selection, process selection, and product design. We bring years of experience with softgoods design to each project. The design is carefully documented through living documents – the textile specification and the engineering drawings – which evolve into the final rubric for accepting the fabric assembly.
Beni’s textile specification is here. We’ll walk through our reasoning and approach to the specification and the concept development below.
Textile design
For longevity, we require that the textile be removable & washable. This means it needs finished edges. We choose a weft knit fabric for two reasons:
- Unlike wovens, knits can stretch and rebound based on their structure.
- Flatbed weft knit machines are available to make tapered, tubular shapes (i.e. beanies) with low waste and few finishing steps required. These machines are commonly known as 3D knitting machines, but they are widely deployed to make beanie-type hats at reasonable cost. They also provide exceptional variety in knit structure.
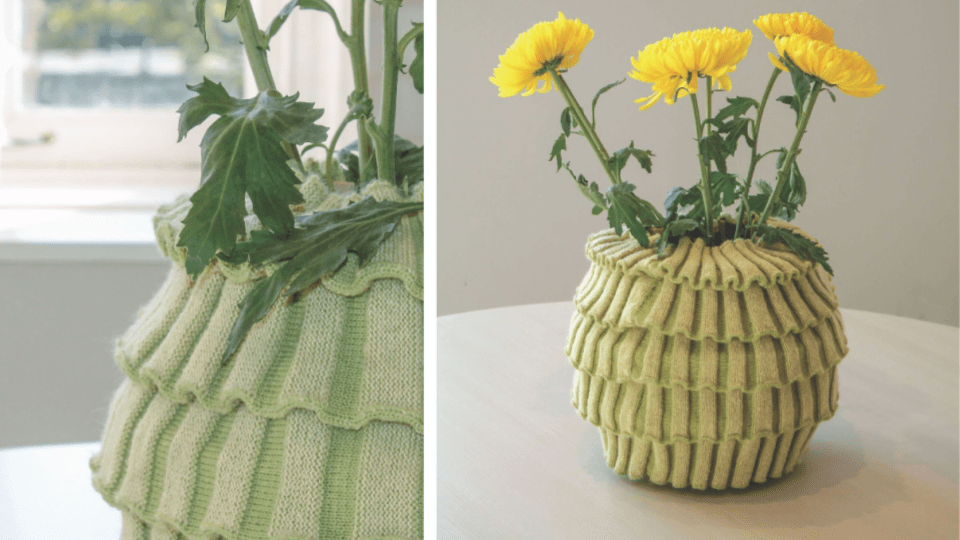
The textile is intended to be posable, taking inspiration from Juyeon’s Vase Knits:
Therefore, it must have a crisp but not too complicated knit structure, with high inter-yarn friction so that the yarns slide very little relative to one another in different “poses”. If they slide too much, the fabric can “set” in the stretched state and won’t rebound when pulled upwards to the smaller end of the lamp. We are relying on yarn elasticity to provide rebound, rather than including elastomeric yarns.
Finally, the textile must be recyclable and compostable at the end of life. Non-mechanical fiber-to-fiber recycling exists for cellulosics, polyester, or poly/cotton blends. Nothing else. Therefore, a cellulosic “monomaterial” is ideal. Luckily, many fibers are cellulosic – linen, cotton, or hemp are all cellulosic and can all be chemically recycled into viscose or composted. To keep the compostability, any finishing stitching must also be cotton. Cotton is the least expensive of cellulosic sewing threads available.
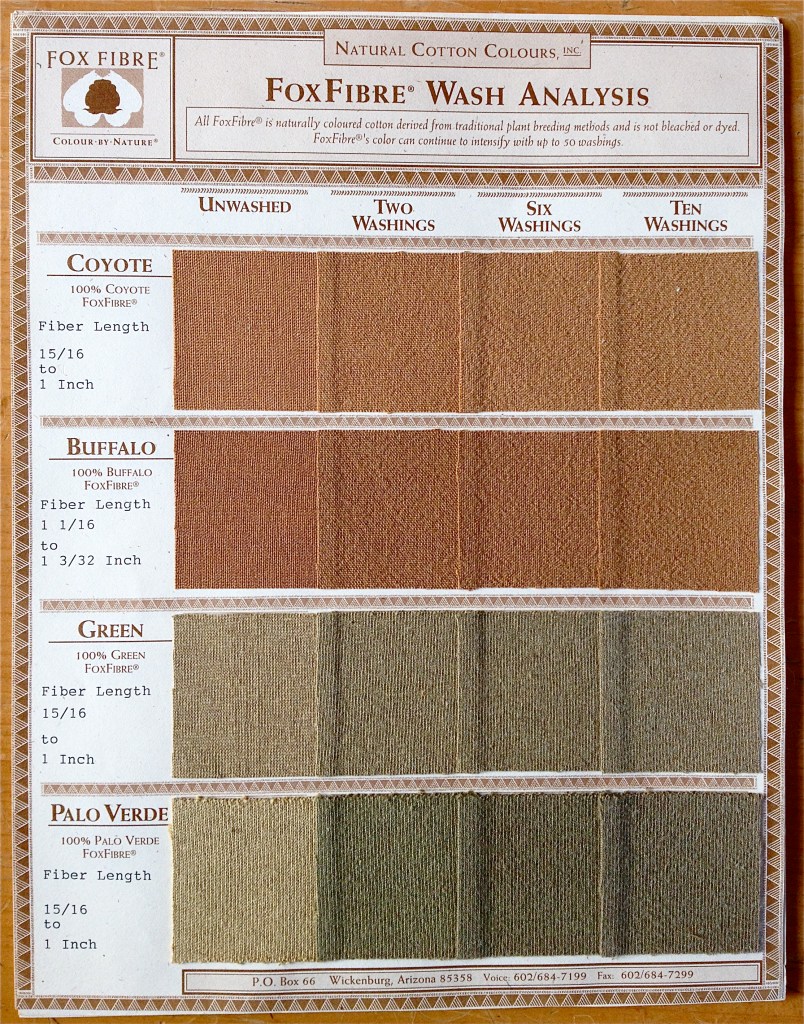
- To maintain safe laundering and compostability, ideally the fabric would not be dyed or finished in any way. Dyes, fire retardants, or antimicrobial finishes cause shed natural fibers to become potentially-harmful fiber fragment pollution and pollute laundry water and soils. Luckily, cotton farmers have bred naturally-colored cotton. We selected foxfiberⓇ colorganicⓇ cotton. These fibers grow in colors ranging from rust, to white, to blue-green, their color deepens with laundering, and they are certified organic. Once the fibers are spun and knitted, we choose not to apply any finishes.
Textile structure requirements
For optimal optical transmission, a thin textile with maximum open area and evenly-sized holes is best (not a distribution of large and small or many large holes with lots of yarn in between).
Therefore, this product needs a thick textile with low open area, and small holes. We recommend a fine gauge with a relatively bulky yarn, or, knitting at a reasonable gauge and achieving the high density by steaming.
To allow it to roll up and down many times (stretching and contracting), without elastic fibers, the textile needs high inter-yarn friction, otherwise the yarns will eventually slip relative to each other and the knit loops will not spring back to the smaller shape.
If, after sampling, we find that it absolutely needs an elastic yarn, we would consider Yulex’s Yulastic double covered with a cellulosic yarn, inlaid in the knit.
Manufacturing process
- A medium gauge knit (machine gauge about 14 gg). Knit to exact dimension or slightly undersized, relative to the device. After knitting, steam to shrink. Exact gauge and manufacturing parameters must be tested with the mass-production-intent yarn and knitting machine.
- Knit to final shape without finished edges. Fold over and stitch the large edge with a blind hem overlock stitch. Insert pull tab into the top of the “hat” while it is inside-out. Finish the raw edges of the knit fabric and stitch in the pull tab at the same time. Add a second row of straight stitches to ensure adequate strength of the joint.
Textile structure specification
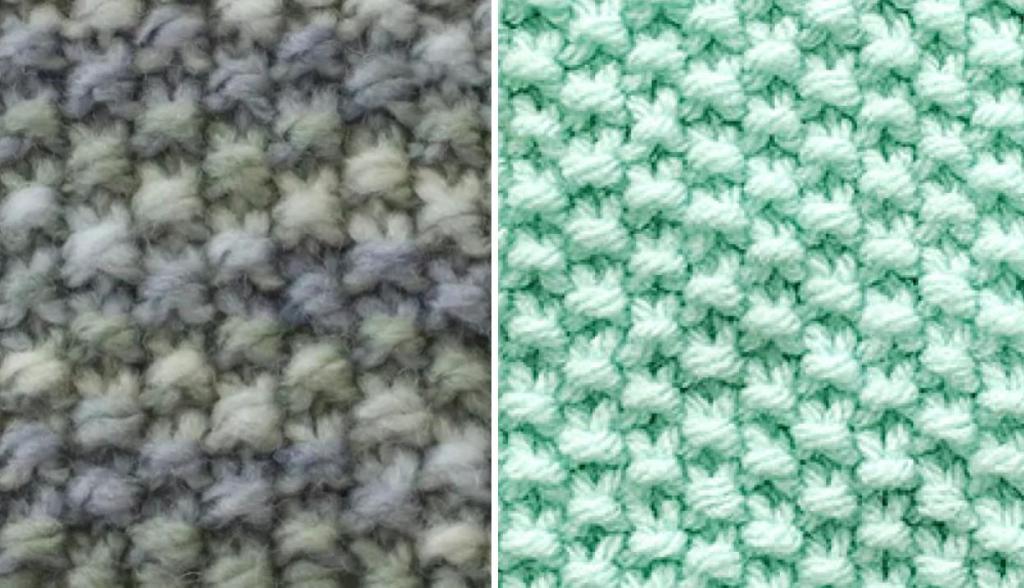
To achieve the structural requirements outlined above, we chose a knit structure called “seed stitch.”
“The close, balanced arrangement of knit and purl stitches creates a relatively thick fabric that lies flat… It’s also strong and very hard-wearing…” from Gathered.
Alternative structures we considered included:
- Jersey and ribs. However, we don’t want a hat-like pattern with jersey knit on top and ribs only on the bottom, as that’s designed to fold right at the stitch transition.
- Single jersey. However, it is also undesirable, since it looks different on the front and the back, whereas seed stitch is reversible.
- Cables & ribs are typical of hats since they stretch a lot and look fun, but these have too much variation in hole size that will make light blocking/transmission patchy.
Seed stitch has great texture, whether knitted in a single color or with multiple colors.
Potential challenges and early solutions
Here are a couple of potential challenges the team could face in bringing the product to market, and our approach to solving or reducing the impact of those challenges on the product development process.
| Challenge | Product development plan |
| The “hat” textile doesn’t have enough elastic rebound. As the hat is pulled onto the smaller top of the lamp, it gets too baggy and slips back down. | Leverage OPD’s knit structure experts. Textiles like this are tricky but very possible to create without elastomeric yarns. Also, textile material and structure can take weeks to months to change, so it is important to define it early.Sample early on in the design process. OPD usually defines an experiment that explores 2 – 3 yarn variables, 2 – 3 knit structures, and several knitting machine parameters. This allows us to decide on the yarn and textile structure in time to be creative with colors and shapes later in the product development process. |
| The textile lets through too much or too little light. | As above, but we can also learn a lot from off-the-shelf samples or custom swatches. OPD has unique experience measuring and modeling light and air transmission of textiles. |
| Reliability issues:Color fadesShrinkage during washing/cleaning/general care | OPD always researches the objective technical performance of materials before we specify them for a project. While color-bred cotton has historically had issues with short fiber length and resultant yarn weakness, we have high confidence in foxfiberⓇ colorganicⓇ yarns. In addition, we would start the sourcing discussion with them by reviewing test reports and samples.Once materials are selected for sampling or prototyping, OPD develops testing plans for each textile that are tailored to the product and client’s needs, testing resources available at factory partners, and industry standards. This ensures that quality control is considered in the design from the very beginning. |
| Unique fiber challenges:What if the yarns are too weak or inconsistent for the intended use? |
The team at Oplossing Design and Gray Dawdy Design is proud of how Beni grew out of a couple goofy inspiration sessions. Get in touch if you’re looking for collaborators in concept development.

One response to “Beni Lamp: Design Process”
[…] up on our Beni Lamp design article, we wanted to discuss the process we used for 3D modelling the textile for use in Gray […]
LikeLike